Table of Contents
This article will help you how to edit photos of yourself to look professional. This manual is written with complete novices in mind. Capturing perfect selfies of yourself is merely the beginning of developing your photographic skills and editing photos of yourself.
The ability to edit photographs expertly is gaining significance. Mastery requires dedication and patience, as there are better methods for picture editing. Nevertheless, you can catch up to or even pass others if you start progressing right now.
How to edit a selfie to look professional?
It’s time to see all the methods you can use to edit selfies of yourself.
Create your unique style
When it comes to professional photo editing, there is no one correct approach. There is a vast range of photo editing techniques used by photo editing experts. Although some photographers choose black-and-white images, others enjoy experimenting with different levels of color saturation.
When it comes to photographs, some people like those with a lot of brightness and whites (a high key), while others prefer those with a more muted tone (a low (dark, and moody).
Explore various online photography portfolios and social media to get ideas for your aesthetic. Choose which aspects of the pictures most appeal to you. Is it the photo’s aesthetic or the way it was made up? In the second case, the aesthetic was likely manufactured in post-production.
Choose a photo editing software
For expert-level photo editing results, a dedicated photo editing application is essential. There are a lot of options out there when you’re looking for how to edit photos of yourself. For you, the ideal photo editor is the one that lets you customize your editing experience to your preferences.
Here is a list of the best-recommended photo editing tools and software:
Lightroom
Lightroom is undoubtedly the greatest photo-editing software available (starting at $9.99/month). It provides both the fundamental and sophisticated tools necessary to create almost any style.
Also, it offers a robust library feature that helps you save, categorize, and access your images quickly and easily. Presets are a powerful feature of Lightroom that allows you to quickly apply various adjustments to an entire pack of photographs with a single click.
Luminar AI
A relatively recent photo manipulator that replaced Luminar 4 is Luminar AI ($64 one-time). It was launched in December 2020. Templates are the app’s foundation; they are essentially AI-powered presets that determine the optimal adjustments for your picture based on its analysis.
Because of the AI features, Luminar AI is also easier to use than Lightroom; however, it offers inferior library tools and masking choices.
Adobe Photoshop
The most well-known picture editing program accessible is Photoshop (from $9.99/month). It’s more complex than Lightroom and has more features, but it’s also more difficult to learn and operate. Also, you can hire a Photoshop expert to do the heavy lifting for you.
Take raw photos to edit photos of yourself better
While this guide tells you how to edit selfies of yourself, you should know that shooting in RAW will provide you with the most flexibility later on. JPG format compresses images, while RAW formats don’t; thus, you get the full resolution every time.
At first sight, you may not be able to tell the difference between a RAW and a JPEG. But, there is a world of difference between the two regarding digital photography and picture editing.
You may change your camera to shoot in RAW by going into its settings and selecting the raw option. In most cases, you’ll have the option of saving in either JPG alone, RAW only, or both formats. Go to the instruction manual if you have trouble locating the menu.
Edited photos in raw format preserve as much original information as possible. JPEG and other compressed formats are unusable for editing due to significant loss of pixel data during compression.
Customize the white balance
The term “color temperature” describes how warm (red or yellow) or cool (blue) light looks to the human eye. Daylight, tungsten, and overcast are just some of the presets you may use to inform your camera exactly what lighting circumstances you’re working with.
The color temperature of most cameras may be set manually, often between 2500K and 6500K, for even more granular control.
Get these settings perfect in the camera for professionally-edited photographs. Still, if you don’t, which is often in poor light, photo editing software may help you adjust the color temperature.
Change the brightness and contrast
If you’ve followed my first piece of advice and shot in RAW, you can make dramatic changes to your picture with quite simple edits. Commonly used controls include exposure (or brightness), contrast, highlights, shadows, whites, blacks, and saturation.
You can determine the values you choose for these controls by the kind of picture you capture and the outcome you want to accomplish. Unless you’re going for a certain style and your main objective is to create a realistic picture, you’ll want to boost the “dynamic range” of the photo.
Reducing highlights, increasing shadows, and adjusting whites and blacks to their proper points are necessary. At these extremes, known as white and black points, white (bright) tones become entirely white, and black (dark) tones become fully black.
Don’t miss the saturation
The next step in how to edit selfies of yourself is to adjust the image’s saturation or the degree to which each color is present. As many newcomers make the mistake of going too far with the saturation, resulting in landscapes that seem like something out of Disney, I advise you to proceed cautiously. An increase of 10 percentage points (or 10%) in saturation is generally acceptable; nevertheless, reducing saturation results in a more natural and aesthetically beautiful picture.
Straighten and crop your photos
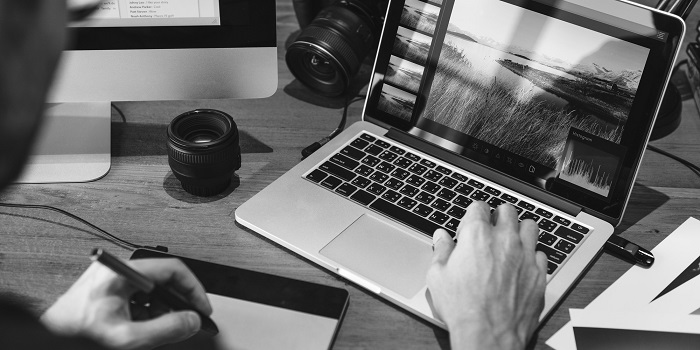
Cropping a photo is a lot like finding a composition while taking pictures; it’s a way to correct or enhance the composition you may have messed up in the field. Cropping is the last option, but it’s important to get the composition correct in the first place.
The rule of thirds is a simple technique to make your compositions seem better when you’re just starting. The rule of thirds is a compositional principle for photographs that recommend arranging your subject matter and leading lines such that they fall along imaginary 3×3 grid lines. You may use the standard gridlines on most cameras to help frame your photographs.
Include a vignette to edit selfies of yourself
A vignette, in technical terms, is a darkening of the image’s borders, often in a circular pattern. By using vignettes, we can guide the viewer’s gaze and aid in the mental processing of the picture.
Every photo editing program has a feature that automatically applies a vignette, but there are situations when you may choose to make your own. Choose a circular local adjustment (or a filter) and lower the brightness of a specific region to create a unique vignette.
Is there any benefit to going with a manual vignette instead of a pre-made one? First, a centered vignette is sometimes the best choice, especially if the image’s main focus isn’t in the middle. Second, it provides a wider range of customization options, such as adding many vignettes and modifying their size, outline, and color.
How to edit selfies on iPhone?
Editing selfies on an iPhone is easy using the built-in Photos app. Here are the steps:
- Open the “Photos” app on your iPhone.
- Find the selfie you want to edit and tap on it.
- Tap the “Edit” button in the top right corner of the screen.
- You’ll see several editing options at the bottom of the screen, such as crop, filters, and adjust.
- To crop your selfie, tap on the crop icon and adjust the crop by dragging the corners of the box.
- To apply a filter, tap on the filters icon and swipe left or right through the different filter options available.
- To adjust the color, brightness, or other settings, tap on the adjust icon and use the sliders to make changes.
- Once you like your edits, tap “Done” in the top right corner of the screen to save your changes.
That’s it! You’ve successfully edited your selfie on your iPhone.
How to edit photos from camera?
There are many ways to edit photos from a camera, but here are some general steps you can follow:
- Transfer the photos from your camera to your computer or device.
- Choose a photo editing software such as Adobe Photoshop, Lightroom, or GIMP.
- Open the software and import the photo(s) you want to edit.
- Use editing tools to adjust various aspects of the photo, such as brightness, contrast, saturation, sharpness, cropping, etc.
Conclusion
You won’t become a master picture editor overnight, but with practice and attention to these points, you may acquire the craft more quickly than the average person.
Knowing how to edit photos of yourself requires you to go outside the box, establish your aesthetic, and provide your audience with something they have yet to see. Knowing how to edit selfies of yourself through Photoshop will also affect your mental health. You can read this blog to learn more about it.
But, as a novice, I realize you are still determining how to start or shape your unique style. Taking inspiration from other well-known photographers is a great approach to begin developing your unique style. Follow their lead, but add your spin to your revisions.
If you’re looking for a simple first assignment, try making a picture using orange and teal.








That is really attention-grabbing, You are an excessively professional blogger. I’ve joined your feed and look ahead to seeking extra of your great post. Also, I have shared your web site in my social networks!
Of course, what a splendid website and enlightening posts, I surely will bookmark your website.Best Regards!